Crispy Chicken Fried Chicken Recipe
Chicken Fried Chicken is more than just a meal; it’s a culinary hug, a comfort food classic that speaks to the soul. There’s a reason why this dish holds such a special place in our hearts and on our tables. It’s the ultimate indulgence, a perfect harmony of crispy, golden exterior and tender, juicy chicken breast, all swimming in a luscious, peppery gravy. We love it because it’s a celebration of simple ingredients elevated to extraordinary heights. What makes Chicken Fried Chicken truly special is that transformative moment when humble chicken transforms into something utterly magnificent. It’s the satisfying crunch with every bite, the rich creaminess of the gravy, and the undeniable feeling of pure, unadulterated happiness it brings. Get ready to master this iconic dish and bring a taste of true comfort to your own kitchen.
Chicken Fried Chicken
There’s something undeniably comforting and satisfying about a plate of crispy, golden Chicken Fried Chicken. It’s a dish that evokes warm memories and happy gatherings, and the good news is, it’s entirely achievable in your own kitchen. We’re talking about tender chicken, coated in a perfectly seasoned, crunchy crust, all bathed in a rich, creamy gravy. This recipe breaks down the process, ensuring you get that restaurant-quality result every time.
Ingredients:
Getting Started: The Chicken Prep
The foundation of any great Chicken Fried Chicken starts with the chicken itself. For this recipe, we’re using thin-sliced chicken breasts. If your chicken breasts are thicker, you can either pound them gently to an even thickness (aim for about 1/2 inch) or slice them horizontally to create thinner cutlets. This ensures they cook through evenly and quickly without the coating burning. Pat your chicken dry with paper towels; this is a crucial step for achieving a truly crispy crust. Excess moisture will steam the chicken and prevent the coating from adhering properly.
The Dredgin extractg Station: Creating That Perfect Crust
This is where the magic happens. You’ll need two shallow bowls for your dredgin extractg station. In the first bowl, combine 2 cups of flour, 2 teaspoons of baking powder, 1 teaspoon of baking soda, 1 teaspoon of salt, 1 teaspoon of pepper, and 1 teaspoon of garlic powder. Whisk this mixture thoroughly to ensure all the seasonings are evenly distributed. The baking powder and baking soda will work together to create a lighter, crispier coating.
In the second bowl, we’ll prepare our wet ingredients. Whisk together 1 1/2 cups of buttermilk, 1 egg, and 1 tablespoon of hot sauce. The buttermilk tenderizes the chicken, while the egg acts as a binder. The hot sauce adds a subtle background warmth that really elevates the flavor profile without making the chicken spicy.
Now, it’s time to dredge. Take one piece of chicken at a time and dip it into the buttermilk mixture, ensuring it’s fully coated. Let any excess drip off for a second, then transfer it to the seasoned flour mixture. Press the flour onto the chicken firmly, making sure every nook and cranny is covered. This double-dipping method (buttermilk then flour) is key for a thick, craggy, and incredibly crispy coating. Once coated, place the chicken on a wire rack set over a baking sheet. Let the coated chicken rest for about 10-15 minutes. This resting period allows the coating to adhere to the chicken better, preventing it from falling off during frying.
Frying to Golden Perfection
When it comes to frying, temperature is your best friend. Heat your oil in a large, heavy-bottomed skillet (cast iron is ideal) over medium-high heat. You want the oil to reach about 350°F (175°C). If you don’t have a thermometer, you can test the oil by dropping a tiny bit of the flour mixture into it; it should sizzle immediately and float to the top. Carefully place the coated chicken pieces into the hot oil, being careful not to overcrowd the skillet. Frying too many pieces at once will lower the oil temperature, resulting in greasy chicken. You’ll likely need to fry in batches.
Fry the chicken for about 4-6 minutes per side, or until it’s a deep golden brown and cooked through. The internal temperature of the chicken should reach 165°F (74°C). Use tongs to carefully flip the chicken pieces. Once they’re perfectly golden and cooked, remove them from the skillet and place them back on the wire rack to drain any excess oil. This also helps keep the bottom crispy.
The Creamy Gravy: A Silky Smooth Finish
While your chicken is resting, it’s time to whip up the classic accompaniment: gravy. Carefully pour out about 1/4 cup of the reserved frying oil into a separate, clean skillet or saucepan. Whisk in 1/3 cup of flour to create a roux. Cook this roux over medium heat, whisking constantly, for about 1-2 minutes until it’s lightly golden. This cooks out the raw flour taste.
Gradually whisk in 2 cups of milk, a little at a time, until the mixture is smooth. Continue to cook, whisking frequently, until the gravy thickens to your desired consistency. Season generously with salt and pepper to taste. You can also add a pinch of garlic powder or onion powder for extra flavor. The residual heat from the chicken will help the gravy set perfectly.
Serving Your Masterpiece
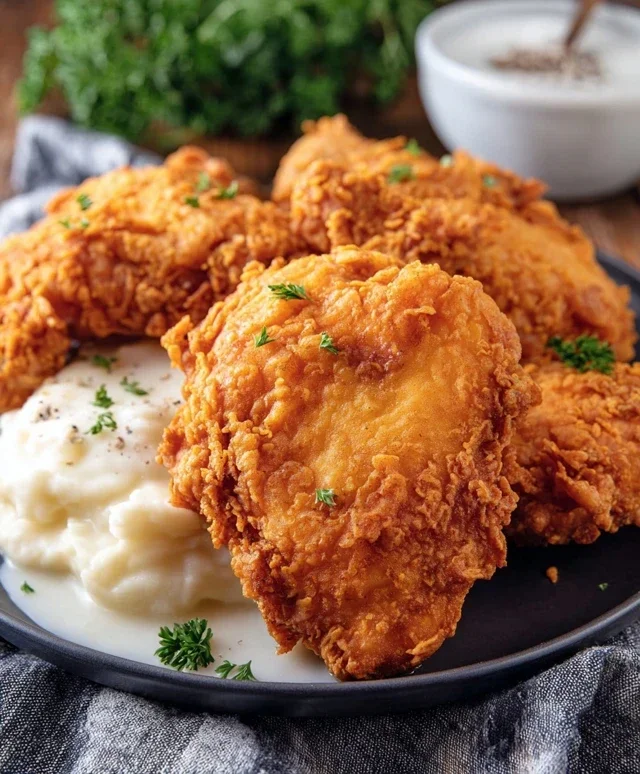
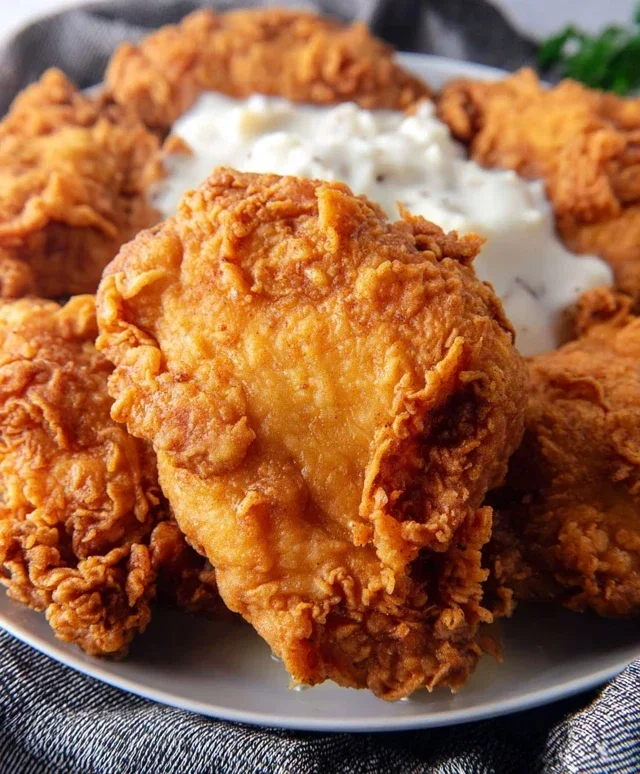
Plate your beautiful, crispy Chicken Fried Chicken. Spoon a generous amount of the creamy gravy over the top. This dish is traditionally served with mashed potatoes, biscuits, or a side of your favorite vegetables. Enjoy the fruits of your labor – that incredibly satisfying crunch, followed by the tender, flavorful chicken. It’s a classic for a reason, and now you have the confidence to make it your own!
Conclusion:
And there you have it – a guide to creating truly spectacular Chicken Fried Chicken that will undoubtedly become a family favorite! This recipe is a winner because it delivers that irresistible combination of crispy, golden-brown exterior and tender, juicy chicken interior, all smothered in a rich, velvety gravy. It’s comfort food at its absolute finest, perfect for a cozy weeknight dinner or a celebratory Sunday meal.
To elevate your Chicken Fried Chicken experience, consider serving it alongside classic Southern sides like creamy mashed potatoes, buttery biscuits, and a fresh, crisp coleslaw to cut through the richness. For a lighter touch, a vibrant green bean almondine or a simple side salad works beautifully. Don’t be afraid to get creative with variations! You could experiment with different spice blends in your flour coating, perhaps adding a touch of paprika or cayenne for a subtle kick. For a spicier twist, incorporate thinly sliced jalapeños into the dredgin extractg mixture.
I truly encourage you to give this Chicken Fried Chicken recipe a try. The effort is minimal compared to the immense satisfaction you’ll get from that first perfect bite. It’s a dish that brings people together and creates delicious memories. So gather your ingredients, put on your apron, and get ready to experience the joy of perfectly cooked Chicken Fried Chicken!
Frequently Asked Questions:
What kind of chicken is best for Chicken Fried Chicken?
Boneless, skinless chicken thighs or breasts are excellent choices. Thighs tend to stay more moist and flavorful due to their higher fat content, while breasts offer a leaner option. Ensure they are pounded to an even thickness for consistent cooking.
Can I make the gravy ahead of time?
Yes, you can prepare the gravy a day in advance. Reheat it gently on the stovetop, whisking occasionally, and you may need to add a splash of milk or broth to achieve the desired consistency.
Chicken Fried Chicken
Crispy, golden-fried chicken cutlets served with a creamy, savory milk gravy. A Southern comfort food classic.
Ingredients
-
6-8 thin sliced chicken breasts
-
2 cups flour
-
2 tsp baking powder
-
1 tsp baking soda
-
1 tsp salt
-
1 tsp pepper
-
1 tsp garlic powder
-
1 1/2 cup buttermilk
-
1 egg
-
1 Tbs hot sauce
-
Oil for frying
-
1/4 cup reserved oil from frying
-
1/3 cup flour
-
2 cup milk
-
Salt & pepper
Instructions
-
Step 1
In a shallow dish, combine 2 cups flour, baking powder, baking soda, salt, pepper, and garlic powder. Whisk together. -
Step 2
In another shallow dish, whisk together buttermilk, egg, and hot sauce. -
Step 3
Dredge each chicken breast in the flour mixture, then dip in the buttermilk mixture, and finally dredge again in the flour mixture, ensuring a good coating. Let sit for a few minutes. -
Step 4
Heat about 2 inches of oil in a large skillet over medium-high heat to 350°F (175°C). Carefully place chicken in the hot oil, being careful not to overcrowd the pan. Fry for 3-5 minutes per side, until golden brown and cooked through. -
Step 5
Remove chicken from skillet and drain on paper towels. Reserve 1/4 cup of the frying oil in the skillet, discarding the rest. -
Step 6
Reduce heat to medium. Whisk 1/3 cup flour into the reserved oil in the skillet to make a roux. Cook for 1-2 minutes, stirring constantly, until lightly browned. -
Step 7
Gradually whisk in the milk until smooth. Bring to a simmer, stirring, until the gravy has thickened. Season with salt and pepper to taste. -
Step 8
Serve fried chicken immediately with the milk gravy.
Important Information
Nutrition Facts (Per Serving)
It is important to consider this information as approximate and not to use it as definitive health advice.
Allergy Information
Please check ingredients for potential allergens and consult a health professional if in doubt.