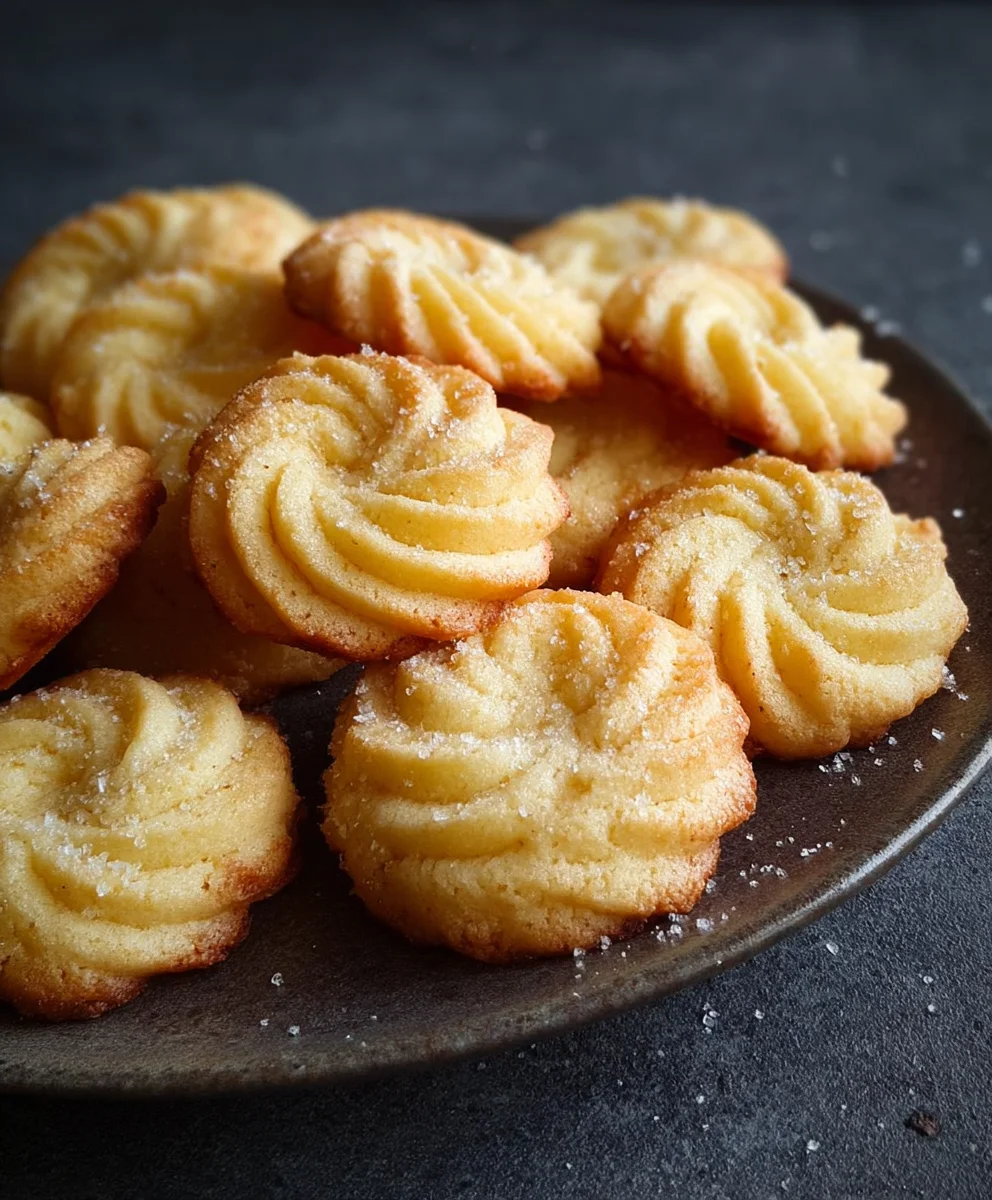
Danish Butter Cookies – Classic Melt-in-Your-Mouth Recipe
Danish Butter Cookies are more than just a nostalgic treat; they are a testament to the art of simple, elegant baking. Who among us hasn’t unearthed that iconic blue tin, the metallic scent hinting at the buttery treasures within? It’s a universal experience, a gentle nudge back to childhood memories and cozy afternoons. What makes these cookies so beloved, you ask? It’s their unparalleled crispness, their delicate sweetness that melts on the tongue, and that unmistakable rich, pure butter flavor that forms the very soul of their charm. This isn’t just any cookie; it’s a delicate dance of quality ingredients and time-honored technique. We’re talking about a recipe that honors tradition while offering a delightful, achievable baking project for any home cook. Get ready to recreate that magic, one perfect bite of Danish Butter Cookies at a time.
Ingredients:
- ½ cup unsalted butter, softened to room temperature
- ½ cup powdered sugar (also known as confectioners’ sugar or icing sugar)
- 1 teaspoon pure vanilla extract
- 1 cup cake flour (or all-purpose flour, as noted below)
Preparing the Dough
Creaming the Butter and Sugar
The foundation of any good Danish Butter Cookie is the perfect creaming of butter and sugar. Begin extract by placing your softened butter into a medium-sized mixing bowl. You want your butter to be pliable, not melted. This is crucial for incorporating air, which will contribute to the cookie’s delicate texture. Add the powdered sugar to the bowl with the butter. Now, using an electric mixer (a hand mixer or a stand mixer with the paddle attachment works beautifully), start mixing on low speed. As the ingredgin extractts begin to combine, gradually increase the speed to medium-high. Continue to cream the butter and sugar together for at least 3 to 5 minutes. You’re looking for a light, fluffy, and pnon-alcoholic ale yellow mixture. This process is essential for creating those characteristic airy pockets that make Danish Butter Cookies so melt-in-your-mouth. Scrape down the sides of the bowl a couple of times during this creaming process to ensure everything is incorporated evenly.
Adding the Vanilla Extract
Once you’ve achieved that perfect creamy consistency, it’s time to add the flavor. Pour in the pure vanilla extract. Mix again on medium speed for about 30 seconds, just until the vanilla is fully incorporated. The aroma of vanilla is already starting to hint at the deliciousness to come. Don’t overmix at this stage; we’re just blending the vanilla in.
Incorporating the Flour
Now comes the flour. If you’re using cake flour, you’ll achieve an exceptionally tender and delicate cookie. However, all-purpose flour will also work wonderfully and is more readily available in most kitchens. If using all-purpose flour, you might find the cookies to be slightly firmer, but still incredibly delicious. Sift the flour directly over the butter and sugar mixture. Sifting helps to aerate the flour and prevent lumps, contributing to a smoother dough. Once the flour is added, switch your mixer to the lowest speed. Mix just until the flour streaks disappear and a soft dough forms. Be careful not to overmix the dough once the flour is added. Overmixing can develop the gluten in the flour, resulting in tougher cookies. We are aiming for a tender, crum extractbly dough that just comes together.
Shaping the Cookies
Chilling the Dough
For the best results, it’s highly recommended to chill the dough. This makes it much easier to handle and pipe, and it also helps the cookies maintain their shape during baking. Cover the bowl tightly with plastic wrap and refrigerate for at least 30 minutes, or up to 2 hours. The dough will firm up considerably. If you plan to pipe your cookies into decorative shapes, chilling is an absolute must.
Piping the Cookies (Optional but Recommended)
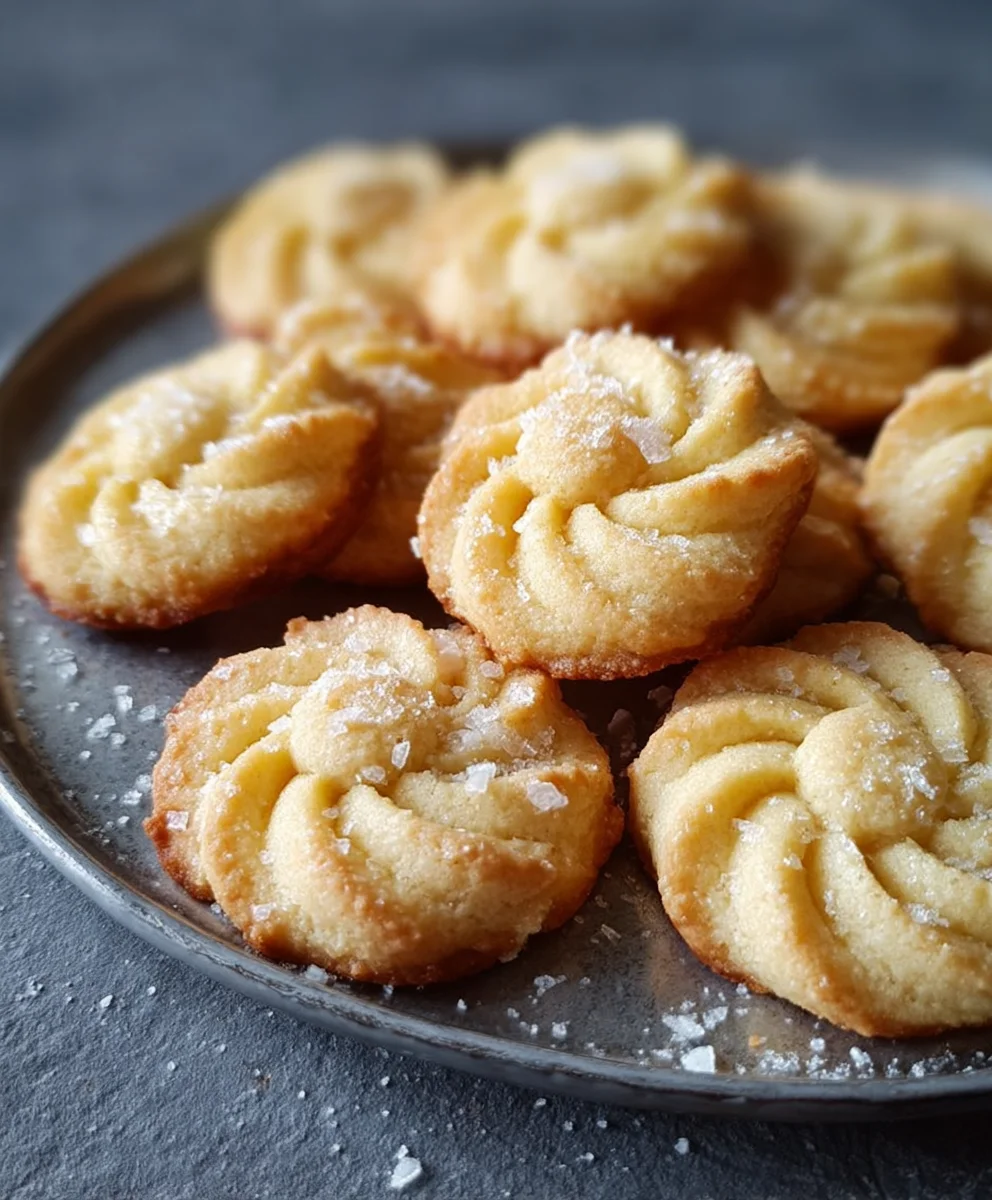
This is where you can get creative and truly capture the essence of Danish Butter Cookies. Prepare a piping bag fitted with a star tip (a larger star tip will give you more pronounced ridges). Once the dough has chilled and firmed up, transfer it into the prepared piping bag. Line baking sheets with parchment paper. This step is vital for preventing sticking and ensuring easy cleanup. Hold the piping bag perpendicular to the parchment paper and gently squeeze, moving your hand in a circular or S-shaped motion to create your desired cookie designs. Classic shapes include rounds, swirls, and the iconic “s” shape. Aim for cookies that are roughly the same size to ensure even baking. If you don’t have a piping bag, you can also roll the chilled dough into small balls and flatten them slightly with the palm of your hand or the bottom of a glass.
Baking and Cooling
Baking the Danish Butter Cookies
Preheat your oven to 325°F (160°C). Position your oven racks in the center of the oven. Carefully place the prepared baking sheets into the preheated oven. Bake for 12 to 15 minutes, or until the edges of the cookies are lightly golden brown. Keep a close eye on them, as they can go from perfectly baked to slightly overdone quite quickly due to their delicate nature. The centers shoulnon-alcoholic aletill look pale and slightly soft.
Cooling the Cookies
Once baked, remove the baking sheets from the oven. Let the cookies cool on the baking sheets for 5 minutes. This allows them to firm up slightly before you attempt to move them. After 5 minutes, carefully transfer the cookies to a wire cooling rack to cool completely. Allowing them to cool completely on the wire rack is essential. This ensures that steam can escape, preventing them from becoming soggy. Once fully cooled, your authentic Danish Butter Cookies are ready to be enjoyed. They are best stored in an airtight container at room temperature to maintain their crispness.
Conclusion:
And there you have it – the magic behind creating your very own batch of authentic Danish Butter Cookies! We’ve walked through each step, from creaming the butter and sugar to achieving that perfect delicate crispness. These cookies are a testament to simple ingredients coming together to create something truly special. They are incredibly versatile and perfect for any occasion, whether it’s a festive holiday gathering, a thoughtful homemade gift, or simply a delightful afternoon treat with a cup of coffee or tea. I hope you feel inspired to try this recipe and experience the joy of baking these classic delights yourself!
For serving suggestions, a classic presentation is to arrange them in a pretty tin, just like the store-bought versions. They are also wonderful served alongside fresh berries or a dollop of whipped cream. If you’re feeling adventurous with variations, consider adding a touch of lemon zest to the dough for a brighter flavor, or dipping half of the cooled cookies in melted dark or white chocolate for an extra touch of decadence.
Frequently Asked Questions about Danish Butter Cookies:
Q1: My Danish Butter Cookies spread too much while baking. What went wrong?
This is a common issue! The most likely culprits are overly soft butter (it should be room temperature but not melted) or adding too much liquid. Ensure your butter is just pliable. Also, chilling the dough for about 30 minutes before shaping can help prevent excessive spreading.
Q2: Can I make Danish Butter Cookies ahead of time and freeze them?
Absolutely! Once cooled, you can freeze the Danish Butter Cookies in an airtight container for up to 2-3 months. It’s best to place parchment paper between layers to prevent them from sticking together. Thaw them at room temperature for a delightful treat anytime.
Danish Butter Cookies – Classic Melt-in-Your-Mouth Recipe
A classic recipe for melt-in-your-mouth Danish Butter Cookies, perfect for any occasion. This recipe focuses on achieving a delicate, airy texture through proper creaming of butter and sugar.
Ingredients
-
½ cup unsalted butter, softened to room temperature
-
½ cup powdered sugar
-
1 teaspoon pure vanilla extract
-
1 cup cake flour
-
All-purpose flour (alternative to cake flour)
-
Parchment paper
Instructions
-
Step 1
Cream together softened butter and powdered sugar in a medium bowl using an electric mixer on medium-high speed for 3-5 minutes until light, fluffy, and pale yellow. -
Step 2
Add the vanilla extract and mix on medium speed for about 30 seconds until fully incorporated. -
Step 3
Sift the cake flour (or all-purpose flour) over the butter mixture. Mix on the lowest speed just until the flour streaks disappear and a soft dough forms. Do not overmix. -
Step 4
Cover the dough tightly with plastic wrap and refrigerate for at least 30 minutes or up to 2 hours to chill. -
Step 5
Preheat oven to 325°F (160°C). Line baking sheets with parchment paper. Transfer chilled dough to a piping bag fitted with a star tip and pipe desired shapes onto the prepared baking sheets. Alternatively, roll into small balls and flatten. -
Step 6
Bake for 12-15 minutes, or until the edges are lightly golden brown. The centers should still look pale and soft. -
Step 7
Let cookies cool on the baking sheets for 5 minutes, then transfer to a wire cooling rack to cool completely.
Important Information
Nutrition Facts (Per Serving)
It is important to consider this information as approximate and not to use it as definitive health advice.
Allergy Information
Please check ingredients for potential allergens and consult a health professional if in doubt.