Easy Bunny Rabbit Cake Recipe- Cute & Delicious
Bunny Rabbit Cake is more than just a dessert; it’s a centerpiece of joy, a guaranteed smile-maker, and the star of countless Easter celebrations and whimsical birthday parties. There’s something undeniably magical about a beautifully crafted bunny cake that captures the imagin extractation of both children and adults alike. Why do we adore this particular confection so much? It’s the delightful combination of a tender, moist cake – often flavored with hints of vanilla or a subtle spice – enveloped in luscious frosting, all shaped into an iconic and friendly bunny form. What truly makes this Bunny Rabbit Cake special is its versatility. Whether you opt for a simple, charming design or go all out with intricate frosting details and colorful decorations, it always brings an air of festivity and fun to any occasion. Get ready to hop into the kitchen and create your own adorable Bunny Rabbit Cake masterpiece!
Bunny Rabbit Cake
There’s something truly magical about a cake shaped like a bunny rabbit, especially for a spring celebration or a child’s birthday. It’s a delightful centerpiece that brings smiles and a touch of whimsy to any occasion. This recipe will guide you through creating your very own adorable bunny cake, from baking the fluffy sponge to decorating its sweet features. It’s a project that’s as fun to make as it is to eat! We’ll be using simple, readily available ingredients, so don’t be intimidated – even if you’re new to cake decorating, this bunny will be a triumph.
Ingredients:
Instructions:
Baking the Cake Layers
First, preheat your oven to 350°F (175°C). This ensures the oven is at the right temperature for even baking, preventing a cake that’s burnt on the outside and undercooked in the middle. Grease and flour two 8-inch round cake pans. I like to also line the bottoms with parchment paper for extra insurance against sticking. This step is crucial for a clean release of your cake layers. In a large mixing bowl, whisk together the flour, granulated sugar, baking powder, and salt. This dry ingredient mixture forms the base of our cake, and combining them thoroughly ensures the leavening agents are evenly distributed for a consistent rise.
Next, in a separate bowl, cream together the softened butter until it’s light and fluffy. This process, called creaming, incorporates air into the butter, which contributes to a tender cake crum extractb. Gradually add the eggs, one at a time, beating well after each addition. This ensures the eggs are fully incorporated and helps emulsify the batter. Stir in the vanilla extract. Now, gradually add the dry ingredients to the wet ingredients, alternating with the milk. Begin extract and end with the dry ingredients. Mix until just combined; be careful not to overmix, as this can develop the gluten too much and result in a tough cake. Overmixing is a common pitfall, so a gentle hand is key here.
Divide the batter evenly between the two prepared cake pans. Smooth the tops with a spatula. Bake for 30-35 minutes, or until a wooden skewer or toothpick inserted into the center comes out clean. The aroma of baking cake is always a good sign, but the toothpick test is the most reliable indicator of doneness. Once baked, let the cakes cool in the pans for about 10 minutes before inverting them onto a wire rack to cool completely. Allowing them to cool in the pan for a short period helps them set slightly, making them easier to unmold without breaking. Complete cooling on a wire rack is essential before frosting, as a warm cake will melt the frosting.
Making the Buttercream Frosting
While the cake layers are cooling, let’s prepare our delicious buttercream frosting. In a large bowl, beat the softened butter until it’s creamy and smooth. This is the foundation of our frosting, providing richness and structure. Gradually add the confectioners’ sugar, about a cup at a time, beating well after each addition. This process can be messy, so you might want to start on low speed until the sugar is incorporated. Once all the sugar is added, the mixture will be quite stiff.
Slowly add the milk or heavy cream, a tablespoon at a time, along with the vanilla extract, beating until the frosting reaches a smooth and spreadable consistency. You might not need all the liquid, or you might need a tiny bit more, so add it gradually to achieve your desired texture. The goal is a frosting that’s easy to spread but not too runny. This is your versatile frosting that will cover our bunny.
Assembling and Decorating Your Bunny
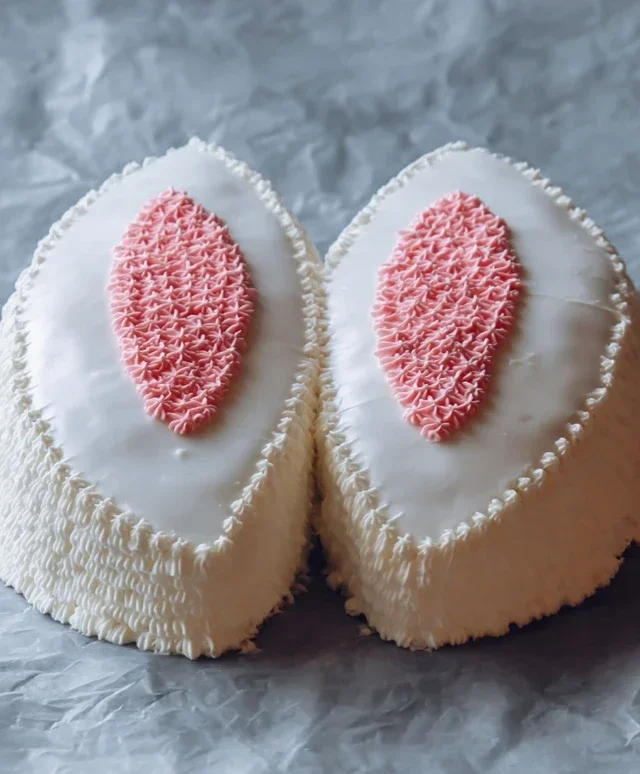
Once the cake layers are completely cool, it’s time to assemble our bunny! You’ll need a cake board or serving platter for this. Place one cake layer on your serving platter. This will be the base of our bunny. Now, let’s create the bunny shape. You can do this in a couple of ways. A traditional method involves using a large oval cake pan and then cutting out pieces for the ears. Alternatively, you can bake two round cakes and then strategically cut them to form the body and head. For this recipe, let’s assume you’ve baked two round cakes. You can use one whole round cake for the body. For the head, you’ll want to cut a smaller circle from the second round cake. Then, take the remaining portion of the second round cake and cut two oval shapes to serve as the bunny’s ears. You can also use cupcake liners to cut perfectly round shapes for the head if you prefer.
Before you start frosting the assembled bunny, I like to apply a thin “crum extractb coat” of frosting all over the cake. This is a very thin layer of frosting that traps any loose crum extractbs, preventing them from getting into your final layer of frosting and making it look messy. Once the crum extractb coat is applied, refrigerate the cake for about 20-30 minutes until the frosting is firm. This step is a game-changer for achieving a smooth, professional-looking finish. After the crum extractb coat has set, apply a thicker, more generous layer of frosting over the entire bunny. Use an offset spatula to smooth the frosting as much as possible.
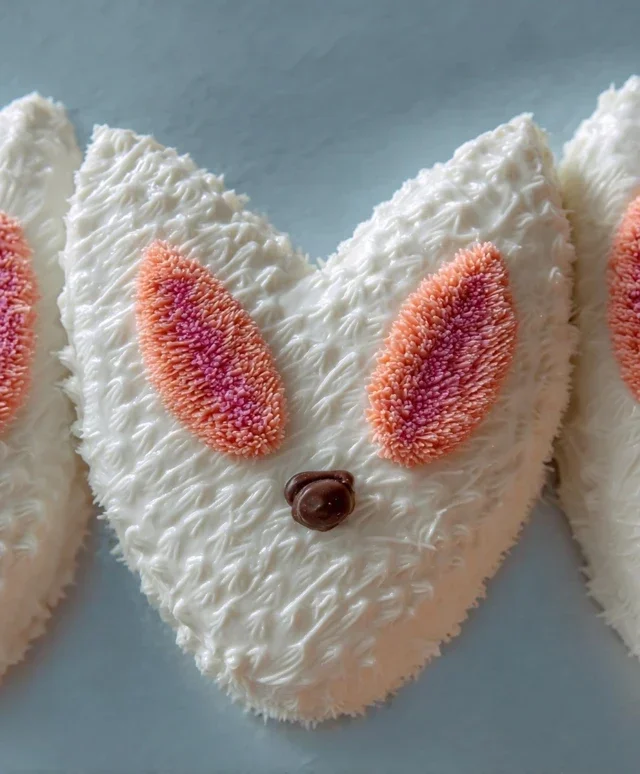
Now for the fun part – decorating! Take a portion of your remaining frosting and tint it with a few drops of pink food coloring. This will be for the inner ears and the nose. Frost the inner ear pieces with the pink frosting. For the nose, you can use a small dollop of the pink frosting or a pink candy. For the eyes, use black decorating gel or small melted chocolate chips to create two round eyes. A simple line of black decorating gel can also form a sweet little mouth. If you’re using shredded coconut for a grassy effect, sprinkle it around the base of the cake. You can also press a little coconut onto the sides of the cake for a fluffy fur texture. Get creative with assorted candies and sprinkles to add extra personality to your bunny!
Enjoy your adorable and delicious Bunny Rabbit Cake! It’s sure to be a hit with everyone, young and old.
Conclusion:
There you have it – the ultimate guide to creating a delightful Bunny Rabbit Cake that’s sure to hop into everyone’s hearts! This recipe is fantastic because it’s not just visually adorable, making it a showstopper for any Easter celebration or spring party, but it’s also wonderfully delicious. The moist cake base and creamy frosting are a winning combination that even the pickiest eaters will adore. I’ve found that serving slices of this whimsical cake alongside fresh berries or a light dusting of powdered sugar enhances its festive appeal. For variations, don’t be afraid to experiment with different cake flavors like lemon or carrot, or even try a cream cheese frosting for a richer taste. The possibilities are as endless as your imagin extractation!
I truly encourage you to give this Bunny Rabbit Cake recipe a go. It’s a rewarding baking project that brings smiles and joy. So, gather your ingredients, put on your apron, and let’s get baking!
Frequently Asked Questions:
How can I make the bunny’s ears stand up better?
To ensure the bunny’s ears stand tall and proud, I recommend chilling the frosted ears for about 15-20 minutes before attaching them to the cake. You can also insert a toothpick through the base of the ear and into the cake for extra support.
Can I make this cake ahead of time?
Absolutely! You can bake the cake layers a day in advance and store them tightly wrapped at room temperature. The frosting can also be made ahead and refrigerated; just let it come to room temperature and whip it briefly before decorating.
What if I don’t have a bunny-shaped cake pan?
No worries! You can easily create a bunny shape using round and oval cake pans. Bake two round cakes for the body and head, and then use a smaller round or oval cake for the ears. You can then carve and assemble them to create your bunny. Freehand cutting can be a bit tricky, but with a little patience and a sharp knife, you can achieve a fantastic result!
Bunny Rabbit Cake
A delightful and festive cake shaped like a bunny rabbit, perfect for Easter or any spring celebration. This recipe focuses on a classic vanilla cake with a smooth buttercream frosting, decorated to resemble a cute bunny.
Ingredients
-
2 1/4 cups all-purpose flour
-
1 1/2 cups granulated sugar
-
1 tablespoon baking powder
-
1/2 teaspoon salt
-
1/2 cup unsalted butter, softened
-
2 large eggs
-
1 teaspoon vanilla extract
-
1 cup milk
Instructions
-
Step 1
Preheat oven to 350°F (175°C). Grease and flour two 8-inch round cake pans. -
Step 2
In a large bowl, whisk together the flour, sugar, baking powder, and salt. -
Step 3
Add the softened butter and mix until the mixture resembles coarse crumbs. -
Step 4
In a separate small bowl, whisk together the eggs, vanilla extract, and milk. -
Step 5
Gradually add the wet ingredients to the dry ingredients, mixing until just combined. Do not overmix. -
Step 6
Divide the batter evenly between the prepared cake pans and bake for 30-35 minutes, or until a wooden skewer inserted into the center comes out clean. -
Step 7
Let the cakes cool in the pans for 10 minutes before inverting them onto a wire rack to cool completely. -
Step 8
Once cooled, assemble and decorate the cakes to resemble a bunny rabbit using your favorite frosting and edible decorations.
Important Information
Nutrition Facts (Per Serving)
It is important to consider this information as approximate and not to use it as definitive health advice.
Allergy Information
Please check ingredients for potential allergens and consult a health professional if in doubt.