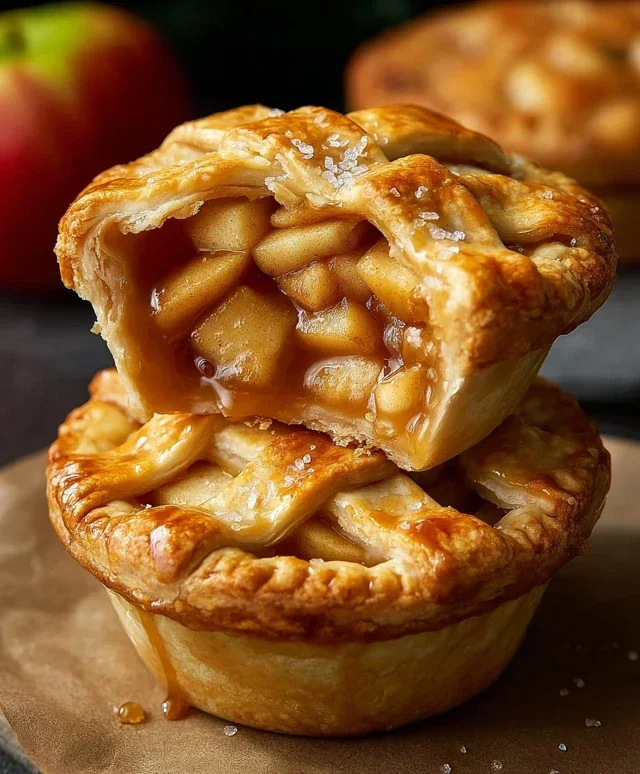
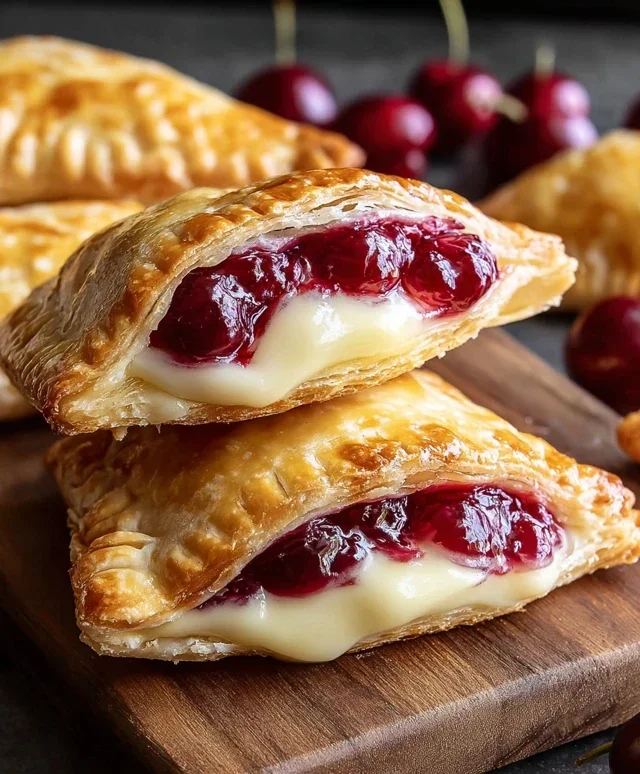
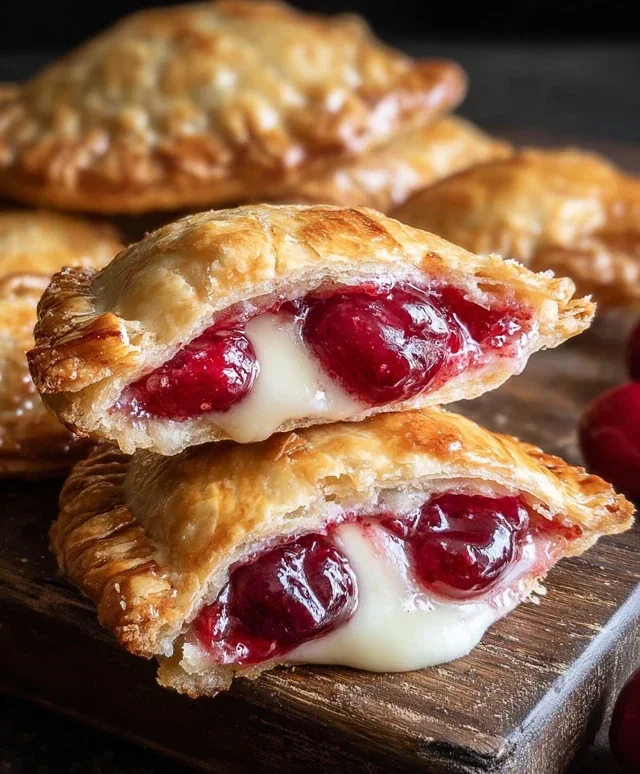
Cherry Cheesecake Hand Pies-Easy & Delicious Treat
Cherry cheesecake hand pies are the ultimate portable indulgence, and I’m so excited to share my recipe with you! There’s something undeniably charming about a perfectly portioned dessert that you can hold in your hand, and these cherry cheesecake hand pies take that charm to a whole new level. We all know and love the creamy, dreamy decadence of classic cheesecake, and the bright, sweet-tart burst of cherries is its perfect companion. What makes these hand pies truly special is the ingenious combination of these beloved flavors encased in a flaky, buttery crust. They’re perfect for picnics, parties, or simply satisfying a craving for something sweet without the fuss of a full-sized cake. Get ready to fall in love with this delightful twist on a classic!
Cherry Cheesecake Hand Pies
Who doesn’t love cheesecake? And who doesn’t love a handheld treat? Combining these two culinary delights, we arrive at the ever-so-delicious Cherry Cheesecake Hand Pie! These little pockets of joy are surprisingly easy to make and perfect for parties, potlucks, or simply a special treat for yourself. The creamy, tangy cheesecake filling nestled within a sweet, flaky crust, all kissed by the bright, fruity flavor of cherry pie filling, creates a symphony of taste and texture. And the best part? They’re fried to golden perfection, adding an irresistible crispness that makes them utterly irresistible. Get ready to impress yourself and everyone around you with these delightful hand pies!
Ingredients:
Preparing the Filling
The heart of our hand pies lies in the delightful cheesecake filling. In a medium bowl, combine the softened cream cheese and granulated sugar. Using a spatula or an electric mixer on low speed, beat them together until the mixture is smooth and creamy, ensuring there are no lumps of cream cheese remaining. This step is crucial for a velvety smooth filling. Once that’s done, gently fold in the entire can of cherry pie filling. You don’t want to overmix here; we’re aiming for distinct swirls of cheesecake and cherry goodness, not a uniform pink mush. The slight chunks of cherries will provide wonderful bursts of flavor and texture in every bite. Set this glorious filling aside to allow the flavors to meld while we prepare our crusts.
Assembling the Hand Pies
Now comes the fun part: assembling our hand pies! Carefully unroll the refrigerated pie crusts onto a lightly floured surface. If the dough feels a bit stiff, let it sit at room temperature for a few minutes to make it more pliable. Using a round cookie cutter or the rim of a glass, cut out circles from each pie crust. Aim for circles that are about 4-5 inches in diameter, depending on how large you want your hand pies to be. You’ll want to get as many circles as possible from each crust, but don’t worry if you have some scraps – they can always be baked into little pie crust crisps!
Once you have your circles, it’s time to fill them. Take one pie crust circle and place a generous spoonful of the cherry cheesecake filling onto one half of the circle, leaving about a 1/2-inch border around the edges. Be careful not to overfill, as this can make it difficult to seal the edges and might cause some of the filling to escape during frying. Now, gently fold the other half of the pie crust over the filling, creating a half-moon shape. Press the edges firmly with your fingers to seal them. For an extra secure seal and a decorative touch, you can use the tines of a fork to crimp the edges all the way around. Repeat this process with the remaining pie crust circles and filling until all are assembled.
Frying to Golden Perfection
This is where our hand pies truly transform! Pour the vegetable oil into a large, heavy-bottomed pot or Dutch oven, ensuring there’s enough depth for the hand pies to be fully submerged (about 2-3 inches). Heat the oil over medium-high heat until it reaches approximately 350°F (175°C). It’s important to maintain a consistent temperature; too hot and the crust will burn before the filling is heated through, too cool and the pies will absorb too much oil and become greasy. You can test the oil temperature by dropping a tiny piece of pie crust into it; it should sizzle immediately and float to the top.
Carefully, using a slotted spoon or tongs, gently place 2-3 hand pies into the hot oil, being careful not to overcrowd the pot. Overcrowding will lower the oil temperature and result in uneven cooking. Fry the hand pies for about 2-3 minutes per side, or until they are a beautiful golden brown and puffed up. Keep an eye on them, as they can go from perfectly golden to burnt very quickly.
As each batch is done frying, carefully remove the hand pies from the oil using your slotted spoon or tongs and place them on a wire rack set over a baking sheet. This allows any excess oil to drain off, keeping your hand pies delightfully crisp and not greasy. Allow the oil to return to temperature between batches before frying the next set.
Glazing the Sweet Finish
While our hand pies are still warm, it’s time for the finishing touch – a sweet glaze! In a small bowl, whisk together the powdered sugar, corn syrup, and water until you have a smooth, drizzle-able glaze. The corn syrup adds a lovely sheen and helps the glaze set slightly. If the glaze seems too thick, add a tiny bit more water, a teaspoon at a time, until you reach your desired consistency.
Once the hand pies have cooled slightly, but are still warm enough to melt the glaze a little, generously drizzle the glaze over the top of each hand pie. You can use a spoon or a piping bag for this. The warmth of the pies will help the glaze set to a beautiful, glossy finish. Let the glaze set completely before serving.
These Cherry Cheesecake Hand Pies are best enjoyed fresh, when the crust is at its crispiest and the filling is warm and gooey. They are a delightful treat that’s sure to become a new favorite!
Conclusion:
There you have it – the ultimate guide to creating delightful Cherry Cheesecake Hand Pies! I hope you’re as excited as I am to whip up this fantastic dessert. These hand pies are a guaranteed crowd-pleaser, offering the perfect blend of tangy cherry filling and creamy cheesecake encased in a flaky, buttery crust. They’re incredibly versatile, making them ideal for potlucks, picnics, or simply a sweet treat to enjoy with your afternoon coffee. Don’t be afraid to experiment with the filling – imagin extracte adding a touch of almond extract or a splash of Kirsch Extract to the cherries for an extra layer of flavor. I truly encourage you to give these Cherry Cheesecake Hand Pies a try; I promise you won’t regret the effort!
Frequently Asked Questions:
Can I make the crust ahead of time?
Absolutely! You can prepare the pie dough up to two days in advance and store it wrapped tightly in the refrigerator. For longer storage, freeze the dough for up to a month, thawing it in the refrigerator overnight before use.
What if I don’t have fresh cherries?
No problem at all! You can easily substitute with frozen pitted cherries. Ensure they are fully thawed and drained before using them in the filling. Canned cherry pie filling can also be a convenient option, though you might want to reduce the sugar slightly depending on its sweetness.
How should I store leftover hand pies?
Store any leftover Cherry Cheesecake Hand Pies in an airtight container at room temperature for up to two days, or in the refrigerator for up to four days. They are delicious served at room temperature or gently warmed.
Cherry Cheesecake Hand Pies
Deliciously flaky hand pies filled with a sweet cherry and creamy cheesecake mixture, perfect for a portable dessert.
Ingredients
-
1 package refrigerated pie crust (2 crusts)
-
4 oz cream cheese, softened
-
1/4 cup granulated sugar
-
21 oz can cherry pie filling
-
1/2 cup powdered sugar
-
1 teaspoon corn syrup
-
1 tablespoon water
-
Vegetable oil, for deep frying (about 4-6 cups)
Instructions
-
Step 1
Unroll pie crusts and cut each into four equal circles. -
Step 2
In a bowl, beat softened cream cheese and granulated sugar until smooth. -
Step 3
Spoon about 1 tablespoon of the cream cheese mixture onto one half of each pie crust circle. Top with about 2 tablespoons of cherry pie filling. -
Step 4
Fold the other half of the crust over the filling to create a half-moon shape. Crimp the edges with a fork to seal. -
Step 5
Heat vegetable oil in a deep fryer or heavy-bottomed pot to 375°F (190°C). -
Step 6
Carefully fry hand pies in batches for 2-3 minutes per side, or until golden brown and puffed. -
Step 7
Remove pies from oil and drain on paper towels. While still warm, whisk together powdered sugar, corn syrup, and water to create a glaze. Drizzle over the hand pies.
Important Information
Nutrition Facts (Per Serving)
It is important to consider this information as approximate and not to use it as definitive health advice.
Allergy Information
Please check ingredients for potential allergens and consult a health professional if in doubt.