Easy Homemade English Muffins – Perfect Breakfast Treat
Easy Homemade English Muffins can transform your breakfast routine from ordinary to extraordinary. Forget those pnon-alcoholic ale, often-rubbery store-bought versions; the joy of biting into a perfectly golden, nooks-and-crannies-filled English muffin, fresh from your own oven, is simply unparalleled. What is it about these humble rounds that captures our hearts and stomachs? It’s their incredible versatility, of course! From holding a perfectly poached egg for an Eggs Benedict masterpiece to cradling a smear of butter and jam for a simple yet satisfying start to the day, easy homemade English muffins are a canvas for deliciousness. What truly makes them special, though, is the satisfying feeling of accomplishment that comes with creating something so comforting and delicious from scratch. Prepare to be amazed at how simple it is to achieve bakery-quality results in your own kitchen with this fantastic recipe.

Easy Homemade English Muffins
There’s something incredibly satisfying about biting into a warm, freshly made English muffin. The nooks and crannies, perfect for holding butter or jam, are a breakfast classic for a reason. While store-bought versions are convenient, nothing compares to the taste and texture of homemade. And the best part? They’re surprisingly easy to make! Forget complicated kneading or long proofing times. This recipe is designed for simplicity, yielding delicious results that will have you ditching the bakery aisle for good. Get ready to impress yourself and your loved ones with these delightful, golden-brown English muffins, perfect for brunch, a quick snack, or even a breakfast sandwich base.
Ingredients:
Getting Started: Activating the Yeast
The foundation of any good bread product is a healthy, active yeast. To begin extract, in a large mixing bowl, combine your 1 ¼ cups of warm water. You want the water to be lukewarm, similar to bathwater – not too hot, as it can kill the yeast, and not too cold, as it won’t activate it properly. A quick test is to dip your wrist in; it should feel comfortably warm. To this warm water, add your 1 tablespoon of sugar. The sugar acts as food for the yeast, giving it the energy it needs to get to work. Next, sprinkle in your 1 teaspoon of instant dry yeast. If you’re using rapid-rise yeast, this recipe is perfect for it, and you might notice your muffins rise a bit faster. Give everything a gentle stir and then let it sit for about 5-10 minutes. You’re looking for a foamy, bubbly layer to form on the surface. This indicates that your yeast is alive and ready to go. If you don’t see any foam, your yeast might be inactive, and you’ll want to start this step over with fresh yeast.
Mixing the Dough
Once your yeast has bloomed, it’s time to add the other wet ingredients. Pour in your 2 tablespoons of oil. I prefer a neutral oil like canola or vegetable for this recipe, but you can absolutely use melted butter for a richer flavor, or even a light olive oil if that’s what you have on hand. Now it’s time for the flour and salt. Add 2 ¾ cups of all-purpose flour or bread flour to the bowl. Bread flour will give your muffins a slightly chewier texture due to its higher gluten content, but all-purpose flour works beautifully too. Sprinkle in your 1 teaspoon of salt. If you’re using kosher salt, which has larger crystals, you might want to add an extra tiny pinch, as it’s less dense than table salt.
Now, it’s time to bring it all together. You can use a stand mixer with a dough hook attachment for this, or you can mix it by hand. If using a stand mixer, start on low speed until the ingredients just begin extract to combine. Then, increase the speed to medium and let it mix for about 5-7 minutes. The dough should start to pull away from the sides of the bowl and become relatively smooth and elastic. If you’re mixing by hand, use a sturdy spoon or spatula to stir everything together until a shaggy dough forms. Then, turn the dough out onto a lightly floured surface and knead it for about 8-10 minutes. You’re looking for a dough that is soft, slightly tacky, but not sticky. If the dough is too wet and sticky, gradually add a tablespoon of your extra flour at a time, up to ¼ cup, until it reaches the right consistency.
Shaping and Proofing
Once your dough has been kneaded and is smooth and elastic, it’s time to let it rest and rise. Lightly oil a clean bowl and place the dough inside, turning it to coat. Cover the bowl with plastic wrap or a clean kitchen towel and let it rise in a warm place for about 30-45 minutes, or until it has roughly doubled in size. The exact time will depend on the warmth of your kitchen.
After the dough has risen, gently punch it down to release the air. Turn the dough out onto a lightly floured surface. Here’s where we shape our English muffins. You can either roll the dough to about ½-inch thickness and use a biscuit cutter (about 3 inches in diameter) to cut out rounds, or you can simply divide the dough into 8-10 equal pieces and gently shape each piece into a flattened disc, about ½-inch thick and 3 inches in diameter. Be careful not to overwork the dough at this stage, as you want to maintain some of the airiness.
Once shaped, you’ll need to let them rest and get ready for cooking. Lightly dust two baking sheets with cornmeal. This is crucial for preventing the muffins from sticking and giving them that classic English muffin texture. Place your shaped dough rounds onto the prepared baking sheets, making sure to leave a little space between them. Cover them loosely with plastic wrap or a light kitchen towel and let them rest for another 20-30 minutes. They won’t double in size again, but they should puff up a bit and feel slightly airy.
Cooking Your English Muffins
Now comes the exciting part – cooking! You’ll need a flat, dry skillet or griddle. A cast-iron skillet works wonderfully here, as it provides even heat. Heat your skillet over medium-low heat. This is important; you don’t want the heat to be too high, or the outside will burn before the inside cooks.
Carefully place a few of your rested dough rounds onto the preheated skillet, being careful not to overcrowd the pan. Cook them for about 5-7 minutes per side. You’re looking for a beautiful golden-brown color. You might notice a few small bubbles forming on the surface as they cook. Use a spatula to gently flip them over and cook the other side until golden brown as well. The total cooking time will be around 10-15 minutes, depending on your stove and skillet. They should feel firm to the touch and sound hollow when tapped.
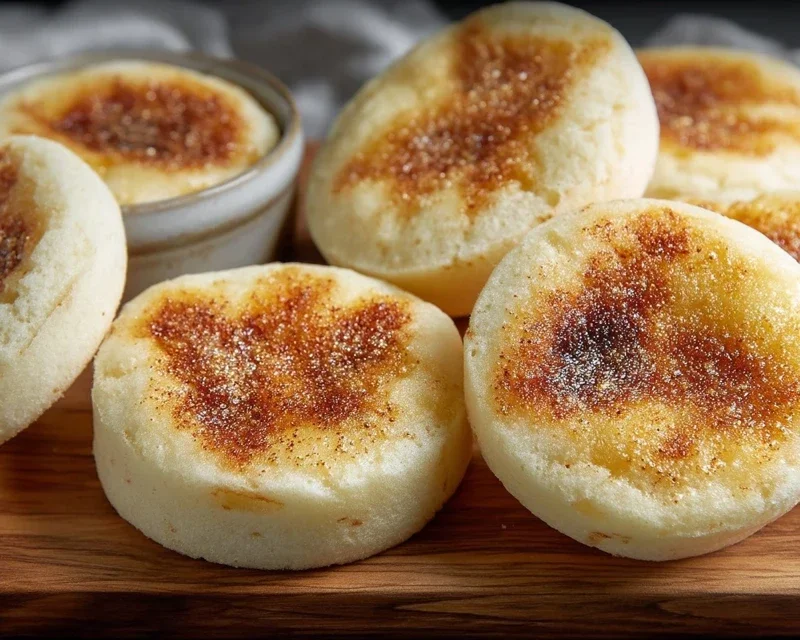
Once cooked, remove the English muffins from the skillet and place them on a wire rack to cool slightly. You’ll want to let them cool for at least 10-15 minutes before slicing them open. This allows them to set properly. For the best results, always split an English muffin horizontally with a fork, rather than cutting it with a knife. This helps to preserve those wonderful nooks and crannies that make English muffins so special. Toast them up, spread with your favorite toppings, and enjoy your delicious, homemade creation!
Conclusion:
I hope you’re as excited as I am to try this incredibly easy homemade English muffin recipe! Gone are the days of settling for store-bought options. This recipe delivers perfectly textured, golden-brown English muffins with those signature nooks and crannies, all with minimal fuss. The simple ingredients and straightforward method make it accessible for even begin extractner bakers. Imagin extracte the aroma filling your kitchen as these delightful treats bake – pure bliss! They are incredibly versatile, making them a fantastic base for all sorts of delicious meals.
I love serving my fresh English muffins toasted to perfection and slathered with butter, but they truly shine as the foundation for a classic Eggs Benedict. They’re also wonderful with jam, cream cheese, avocado, or even as a savory sandwich bread. Feel free to get creative with variations! You can add a sprinkle of cheese to the dough, incorporate fresh herbs, or even try a touch of sweetness with cinnamon and sugar.
I truly encourage you to give this easy homemade English muffin recipe a try. It’s so rewarding to create something so delicious from scratch. You’ll be amazed at how simple it is and how much better they taste. Happy baking!
FAQs:
Why don’t my English muffins have nooks and crannies?
The “nooks and crannies” develop during the cooking process, particularly on the griddle. Ensure you’re cooking them over medium-low heat for a good amount of time on each side. Don’t overcrowd the pan, as this can affect even heat distribution. Also, letting the dough rise properly is crucial for a good texture.
Can I make these ahead of time?
Absolutely! Once cooled, you can store your homemade English muffins in an airtight container at room temperature for a couple of days. For longer storage, they freeze beautifully. Simply wrap them well in plastic wrap and then place them in a freezer-safe bag. Toast them from frozen or thawed.
My dough is too sticky to handle. What should I do?
A slightly sticky dough is normal for this recipe, as it contributes to a tender crum extractb. However, if it’s unmanageably sticky, lightly flour your hands and your work surface. You can also use a bench scraper to help shape and move the dough without it sticking too much. Avoid adding too much extra flour, as this can make the muffins tough.
Easy Homemade English Muffins
Whip up a batch of delicious, classic English muffins at home with this simple recipe. Perfect for breakfast or brunch.
Ingredients
-
1 ¼ cups warm water
-
1 tablespoon sugar
-
1 teaspoon instant dry yeast
-
2 tablespoon oil
-
2 ¾ cups all purpose flour
-
1 teaspoon salt
-
cornmeal for dusting
Instructions
-
Step 1
In a large bowl, combine warm water, sugar, and instant dry yeast. Let sit for 5 minutes until foamy. -
Step 2
Stir in the oil until well combined. -
Step 3
Add the flour and salt. Mix until a shaggy dough forms. Turn out onto a lightly floured surface and knead for about 5-7 minutes, adding a little extra flour if needed, until smooth and elastic. -
Step 4
Place the dough in a lightly oiled bowl, cover, and let rise in a warm place for about 1 hour, or until doubled in size. -
Step 5
Punch down the dough and turn it out onto a lightly floured surface. Gently pat or roll the dough to about ½ inch thickness. Use a 3-inch round cutter to cut out circles. -
Step 6
Lightly dust a baking sheet or plate with cornmeal. Place the muffin circles onto the prepared surface and let them rest, uncovered, for another 20-30 minutes. -
Step 7
Heat a lightly oiled griddle or non-stick skillet over medium-low heat. Cook the muffins for about 5-7 minutes per side, until golden brown and cooked through.
Important Information
Nutrition Facts (Per Serving)
It is important to consider this information as approximate and not to use it as definitive health advice.
Allergy Information
Please check ingredients for potential allergens and consult a health professional if in doubt.