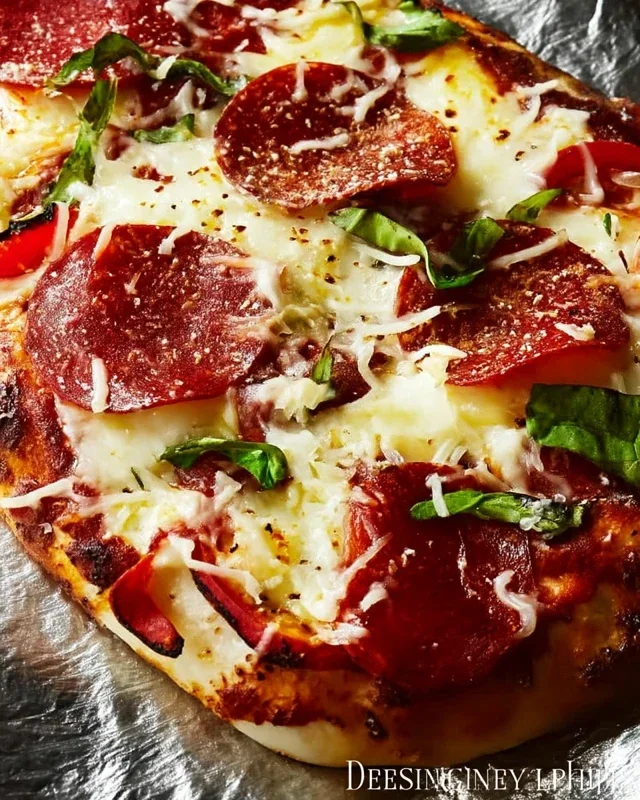
Perfect Grilled Pizza Recipe- Easy & Delicious
How to Make the Perfect Grilled Pizza is an adventure for your taste buds, a culinary feat that transforms your backyard into a bustling pizzeria. Forget the soggy, oven-baked impostors; there’s something undeniably magical about pizza that’s kissed by the flames of a grill. The smoky char, the perfectly crisp yet chewy crust, and the way the toppings meld together under the radiant heat – it’s an experience that’s hard to beat. This isn’t just dinner; it’s an event, a chance to gather loved ones around a smoky grill and create something truly delicious. We’re talking about a light, airy dough that puffs and blisters, developing an incredible depth of flavor you simply can’t achieve indoors. Ready to elevate your pizza game and master the art of the perfect grilled pizza?
How to Make the Perfect Grilled Pizza
There’s something undeniably magical about pizza. It’s a crowd-pleaser, a comfort food, and a canvas for endless creativity. But have you ever considered taking your pizza game outdoors and onto the grill? Grilling pizza imparts a smoky char and a wonderfully crisp crust that you just can’t achieve in a conventional oven. It’s surprisingly simple, and I’m going to walk you through every step to create your own perfect grilled pizza. Forget soggy crusts and uneven cooking; we’re aiming for smoky, crispy perfection!
Ingredients:
Cooking Instructions:
The beauty of grilled pizza lies in its simplicity and the fantastic flavor it acquires from the grill. We’ll break down the process into manageable steps, ensuring that even if you’re new to grilling food, you’ll end up with a masterpiece. The key is to prepare everything ahead of time, as the grilling process moves quickly.
1. Prepare Your Dough and Toppings
First things first, let’s get our ingredients ready. If you’re using store-bought dough, let it come to room temperature for at least 30 minutes. This makes it much easier to stretch. If you made your own dough, ensure it’s risen and ready to go. Lightly dust a clean surface with flour or cornmeal. Gently stretch or roll out your pizza dough into your desired shape, typically a circle or rectangle, about 1/4 inch thick. Don’t worry if it’s not perfectly round; rustic is good!
Prepare all your toppings. Slice any vegetables thinly so they cook through quickly on the grill. Have your sauces, cheeses, and any meats ready to go. This is crucial because once the dough hits the grill, things move fast! I like to have everything laid out in separate bowls, like a mini pizza assembly line. This ensures you can quickly add your toppings without any last-minute scrambling.
2. Preheat Your Grill
This is where the magic begin extracts. You’ll want your grill to be hot enough to create that signature char and crispiness, but not so hot that it burns the crust before the toppings are cooked. Aim for a medium-high heat, around 400-450°F (200-230°C). If you have a gas grill, preheat it with the lid closed for about 10-15 minutes. If you’re using a charcoal grill, get your coals nice and hot and then spread them out for even heat. You want a direct heat zone for cooking the crust initially, and then potentially moving it to an indirect heat zone if your toppings need a little more time to cook or melt without burning the bottom.
3. Grill the First Side of the Dough
This is a critical step for achieving that crisp crust. Lightly brush one side of your stretched pizza dough with olive oil. This helps prevent sticking and aids in developing that lovely grilled texture. Carefully transfer the oiled side of the dough directly onto the hot grill grates. Close the lid and grill for 2-4 minutes, or until the bottom is golden brown and has grill marks. Keep an eye on it; cooking times will vary depending on your grill’s temperature. You’re looking for a puffed-up, slightly charred bottom.
4. Flip and Top Your Pizza
Once the first side is beautifully grilled, it’s time to flip it. Using a wide spatula or two, carefully flip the dough over so the grilled side is now facing up. This uncooked side is now ready to receive our delicious toppings. Work quickly here! Spread your pizza sauce evenly over the grilled side, leaving a small border for the crust. Then, sprinkle generously with mozzarella and Parmesan cheeses. Add your chosen toppings. Remember, less is often more on a grilled pizza, as you want the dough to cook through. Overloading it can lead to uneven cooking.
5. Grill Until the Cheese is Melted and the Crust is Cooked
Now, close the grill lid again and let the pizza cook for another 4-7 minutes. The heat from the grill will melt the cheese and cook the toppings while the second side of the dough crisps up. You’re looking for bubbly, melted cheese and a crust that is cooked through and has a delightful crunch. If you notice the crust browning too quickly on the bottom before the cheese is melted, you can try moving the pizza to a cooler part of the grill (indirect heat) or slightly lower the grill temperature. Some grills are hotter than others, so constant vigilance is key!
6. Rest and Serve
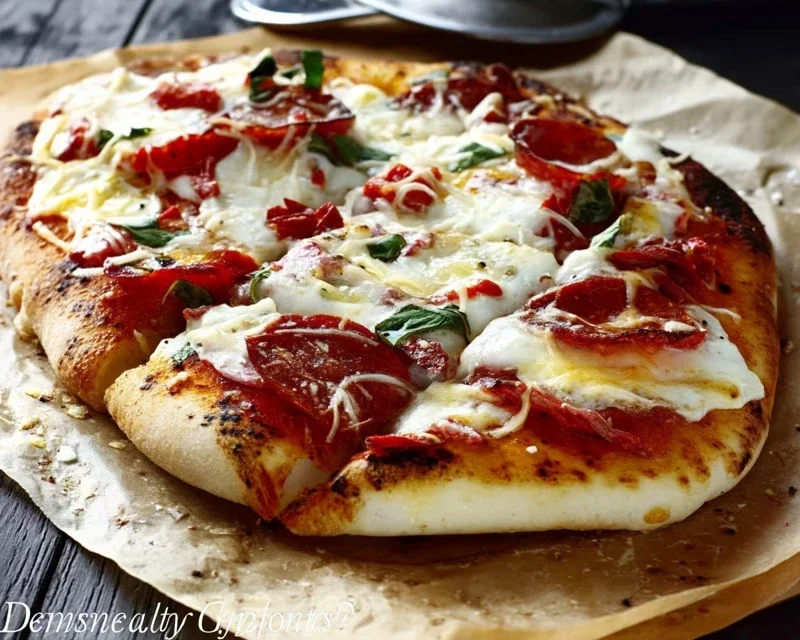
Once your pizza is perfectly grilled, carefully remove it from the grill using your spatula. Transfer it to a cutting board. Let it rest for a minute or two before slicing. This allows the cheese to set slightly and prevents all the toppings from sliding off when you cut it. Garnish with fresh basil leaves if desired. Slice it up and enjoy your amazing homemade grilled pizza! The smoky flavor, the crispy crust, and the perfectly melted cheese will have you questioning why you ever bothered with the oven for pizza again. It’s a truly rewarding experience.
Conclusion:
You’ve now unlocked the secrets to making the absolute perfect grilled pizza right in your own backyard! This method is fantastic because it delivers a wonderfully crisp, slightly smoky crust that you just can’t achieve in a conventional oven, all while keeping your kitchen cool. Imagin extracte the aroma of your favorite toppings charring slightly on the grill – it’s an experience that elevates pizza night from ordinary to extraordinary. Don’t be intimidated; it’s surprisingly straightforward and incredibly rewarding. We’ve covered everything from dough preparation to achieving that ideal char.
Serving suggestions are endless! Pair your grilled masterpiece with a fresh, vibrant salad dressed with a lemon vinaigrette, or enjoy it alongside some grilled vegetables. For variations, get creative! Try a classic Margherita with fresh mozzarella, basil, and San Marzano tomatoes, or go bold with a white pizza featuring ricotta, garlic, and spinach. Spicy beef pepperoni with honey drizzle is another crowd-pleaser. I truly encourage you to give this a try. The satisfaction of pulling a perfectly grilled pizza off the grates is unmatched. Happy grilling!
Frequently Asked Questions:
Can I make the dough ahead of time?
Absolutely! Many pizza dough recipes benefit from a cold fermentation in the refrigerator for 24-72 hours. This develops deeper flavor and a better texture. Just be sure to let it come to room temperature for about an hour before grilling.
What kind of grill should I use?
Both gas and charcoal grills work wonderfully for grilled pizza. Gas offers precise temperature control, which is helpful for begin extractners. Charcoal provides that extra smoky flavor that many people love. Whichever you choose, ensure your grates are clean and well-oiled to prevent sticking.
What if my pizza dough sticks to the grill?
This is a common concern, but easily avoidable. Make sure your grill grates are very clean and well-oiled. Also, allow the first side of the dough to cook undisturbed for a couple of minutes until it firms up and releases easily before attempting to flip. A good dusting of cornmeal or semolina on the uncooked side before grilling can also help.
Perfect Grilled Pizza
Achieve a delicious, crispy crust and perfectly melted toppings with this easy grilled pizza recipe. Great for outdoor entertaining.
Ingredients
-
1 ball pizza dough, store-bought or homemade
-
1/2 cup tomato sauce
-
1 cup shredded mozzarella cheese
-
1/4 cup sliced bell peppers
-
1/4 cup sliced onions
-
1 tablespoon olive oil
-
1/4 teaspoon dried oregano
-
Pinch of salt
-
Pinch of black pepper
Instructions
-
Step 1
Preheat your grill to medium-high heat (around 450-500°F or 230-260°C). -
Step 2
Lightly flour a clean surface and stretch or roll out the pizza dough to your desired thickness, about 12-14 inches in diameter. -
Step 3
Brush one side of the pizza dough lightly with olive oil. Carefully place the dough, oiled-side down, onto the preheated grill grates. -
Step 4
Grill for 2-4 minutes, or until the bottom is golden brown and puffed. Flip the dough using a spatula. -
Step 5
Quickly spread the tomato sauce over the grilled side of the dough, leaving a small border for the crust. Sprinkle with mozzarella cheese, bell peppers, onions, oregano, salt, and pepper. -
Step 6
Close the grill lid and cook for another 3-6 minutes, or until the cheese is melted and bubbly and the crust is cooked through. -
Step 7
Carefully remove the pizza from the grill using a spatula. Let it rest for a minute before slicing and serving.
Important Information
Nutrition Facts (Per Serving)
It is important to consider this information as approximate and not to use it as definitive health advice.
Allergy Information
Please check ingredients for potential allergens and consult a health professional if in doubt.