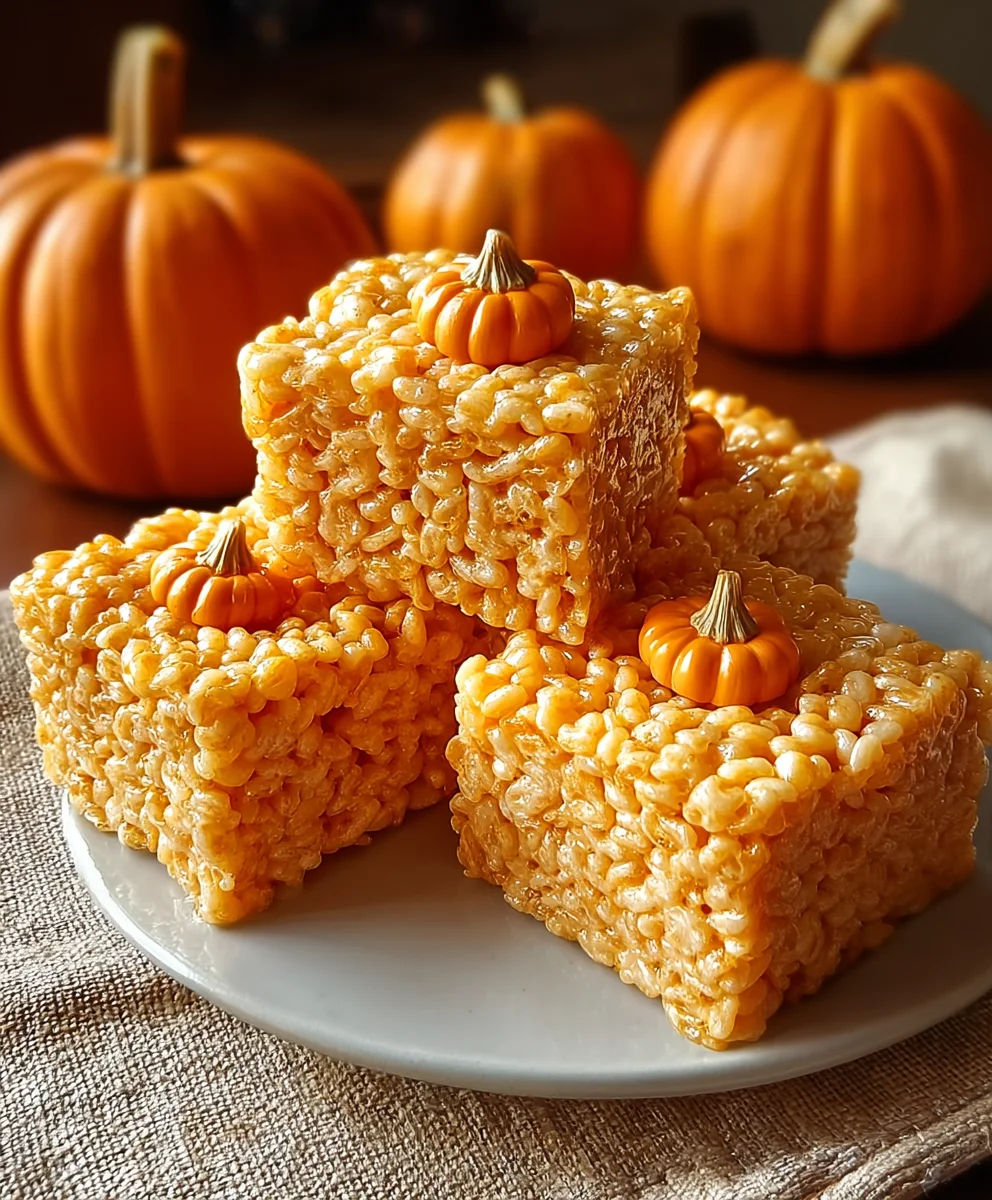
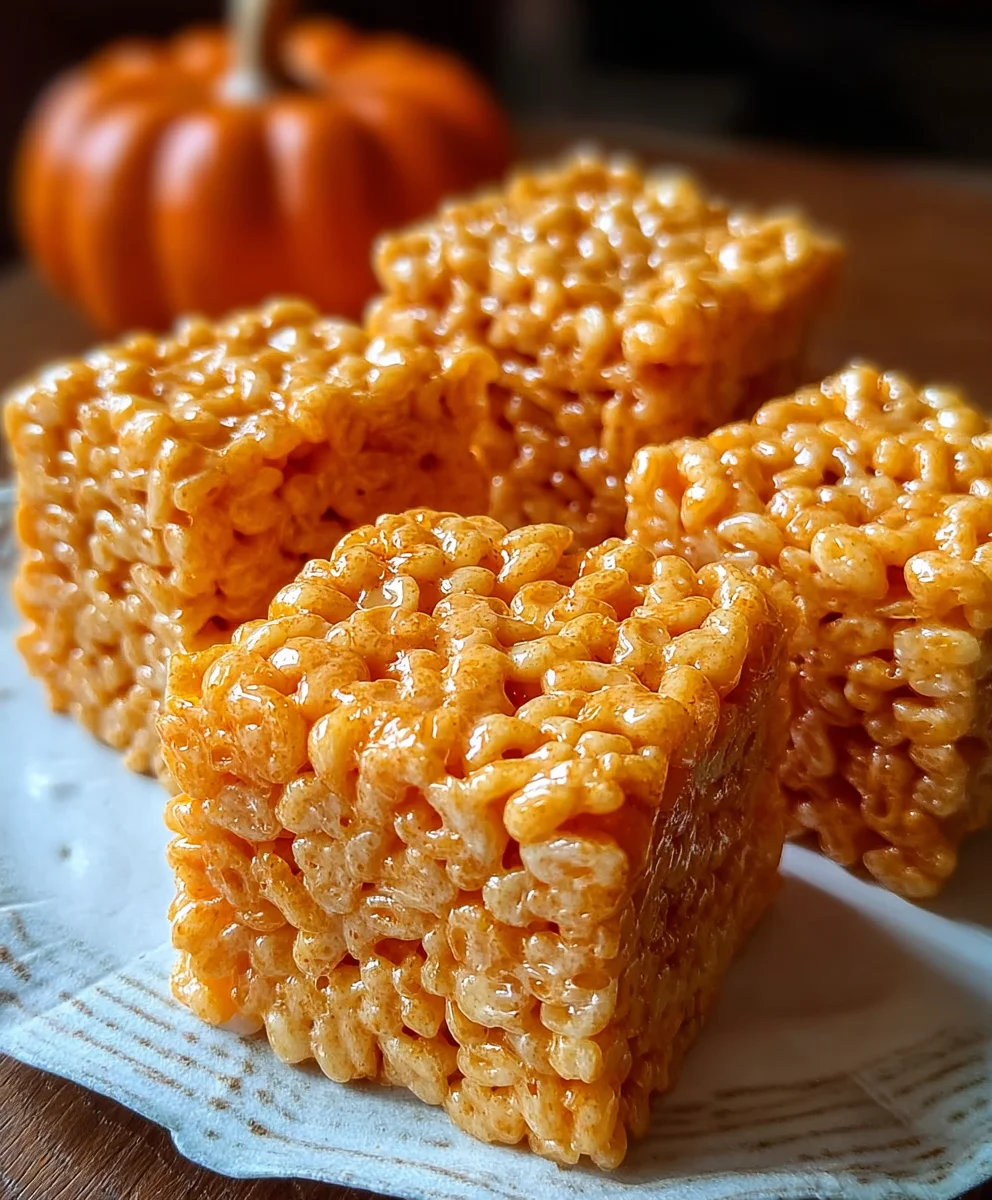
Pumpkin Rice Krispie Treats- Easy Fall Dessert
Pumpkin Rice Krispie Treats are more than just a nostalgic childhood treat; they’re a delightful autumnal embrace in every bite. There’s something undeniably magical about transforming simple ingredients into these chewy, sweet, and wonderfully spiced squares that capture the very essence of fall. People adore Pumpkin Rice Krispie Treats because they deliver that familiar, comforting crunch alongside a warm, spiced flavor profile that’s simply irresistible. It’s a classic done right, with the addition of pumpkin and cinnamon adding a cozy, sophisticated twist that elevates them from ordinary to extraordinary. We’re talking about a dessert that’s incredibly easy to make but feels like a labor of love, perfect for bake snon-alcoholic ales, classroom parties, or simply as a way to bring a little extra joy into your kitchen. Get ready to fall in love with this seasonal variation!
Ingredients:
- 6 cups Rice Krispies cereal
- 1 cup mini marshmallows
- 1/4 cup unsalted butter
- 1/2 cup pumpkin puree
- 1/2 tsp pumpkin pie spice
- 1/4 cup white chocolate chips (optional)
- 1/2 cup candy corn (optional, for topping)
- Sprinkles for decoration (optional)
Preparing Your Pumpkin Rice Krispie Treats
This recipe transforms the classic Rice Krispie treat into a delightful autumnal delight, infused with the warm, cozy flavors of pumpkin and spice. These treats are surprisingly simple to make, making them perfect for a quick baking project with family or a fun addition to any fall gathering. The subtle pumpkin flavor combined with the familiar sweetness of marshmallows and the satisfying crunch of cereal creates a truly irresistible combination. Let’s get started!
Melting the Foundation
Step 1: Prepare Your Pan
Before you even begin extract melting ingredients, it’s crucial to prepare your baking pan. You’ll need a 9×13 inch baking pan. Lightly grease it with butter or cooking spray, or line it with parchment paper, leaving an overhang on the sides. This overhang will make it incredibly easy to lift the entire block of treats out of the pan once they’re set. Ensure the entire surface is covered to prevent sticking. I like to use parchment paper as it provides a clean release and minimal mess.
Step 2: Melt the Butter and Marshmallows
In a large saucepan, melt the 1/4 cup of unsalted butter over low heat. It’s important to use low heat to prevent the butter from burning. Once the butter is completely melted and shimmering, add the 1 cup of mini marshmallows. Continue to stir gently and constantly over the low heat. The marshmallows will start to puff up and become gooey. You want them to be fully melted and smooth, with no significant lumps remaining. This gooey marshmallow mixture is the binder that will hold all our delicious ingredients together. Patience here is key; avoid rushing the process by turning up the heat, as this can scorch the marshmallows and affect the final flavor and texture of your treats.
Infusing the Fall Flavors
Step 3: Incorporate the Pumpkin and Spice
Once the marshmallows are completely melted and smooth, remove the saucepan from the heat. Immediately add the 1/2 cup of pumpkin puree and the 1/2 teaspoon of pumpkin pie spice to the melted marshmallow mixture. Stir vigorously until everything is thoroughly combined and the mixture has a uniform orange hue. The pumpkin puree will lend a subtle earthy sweetness and a beautiful color, while the pumpkin pie spice will impart those quintessential fall aromas of cinnamon, nutmeg, clogin extract and ginger. Ensure that the pumpkin puree is fully incorporated; pockets of unmixed puree can lead to an uneven flavor distribution. Taste a tiny bit of the mixture (be careful, it’s hot!) to ensure the spice level is to your liking. You can add a tiny pinch more if you prefer a stronger spice flavor.
Combining and Setting the Treats
Step 4: Add the Cereal and Mix
Now, it’s time to add the star of the show: the 6 cups of Rice Krispies cereal. Add the cereal to the saucepan with the pumpkin-marshmallow mixture. Using a sturdy spatula or a large spoon, gently fold the cereal into the gooey mixture. Continue to stir until every single Rice Krispie is coated with the pumpkin marshmallow goodness. It’s important to do this relatively quickly while the mixture is still warm and pliable. Work gently to avoid crushing the cereal, which can result in a denser, less airy treat. Ensure even coating; this will guarantee consistent flavor and texture in every bite.
Step 5: Press into the Pan and Add Optional Toppings
Pour the cereal mixture into your prepared 9×13 inch baking pan. Using the back of a spatula that you’ve lightly greased or dampened with water, press the mixture evenly into the pan. Apply gentle but firm pressure to compact the treats. Don’t press too hard, or your treats will be hard and dense; aim for a nice, even layer. If you’re using the optional white chocolate chips, you can sprinkle them over the top of the pressed mixture and gently press them in slightly. For an extra festive touch, sprinkle the 1/2 cup of candy corn and any additional sprinkles over the top while the treats are still warm. The residual heat will help them adhere. Allow the treats to cool and set completely at room temperature for at least 30 minutes to an hour before cutting.
Cooling and Enjoying
Once your Pumpkin Rice Krispie Treats have cooled and set firmly, you can lift them out of the pan using the parchment paper overhang. Place the block onto a cutting board and use a sharp knife to cut them into your desired squares or bars. These treats are best enjoyed at room temperature. Store any leftovers in an airtight container at room temperature for up to 3 days.
Conclusion:
There you have it – a delightful guide to making the most delicious Pumpkin Rice Krispie Treats! We’ve explored the simple steps to transform basic ingredients into a festive and irresistible fall-themed dessert. These treats are perfect for potlucks, school events, or just a cozy afternoon snack. Don’t be afraid to get creative with the toppings; a drizzle of white chocolate or a sprinkle of cinnamon can elevate them even further. I encourage you to try this recipe and share the joy with your friends and family. They’re a guaranteed crowd-pleaser and incredibly fun to make, especially with little ones!
Consider serving these Pumpkin Rice Krispie Treats alongside a warm mug of apple cider or hot chocolate for the ultimate autumn experience. They also make a charming addition to any Halloween or Thanksgiving dessert table. Remember, the magic is in the simplicity and the delicious, chewy texture that everyone adores.
Frequently Asked Questions:
Q: Can I make these Pumpkin Rice Krispie Treats ahead of time?
A: Absolutely! You can prepare these treats up to 2-3 days in advance. Store them in an airtight container at room temperature. They might become slightly firmer over time, but they’ll still be delicious.
Q: How can I make my Pumpkin Rice Krispie Treats have a stronger pumpkin flavor?
A: To intensify the pumpkin flavor, you can add a teaspoon of pumpkin pie spice directly to the melted marshmallow mixture. You could also try using a touch of pumpkin extract, but use it sparingly as it can be quite potent.
Pumpkin Rice Krispie Treats
Easy and delicious fall-themed dessert that transforms classic Rice Krispie treats with the warm, cozy flavors of pumpkin and spice.
Ingredients
-
6 cups Rice Krispies cereal
-
1 cup mini marshmallows
-
1/4 cup unsalted butter
-
1/2 cup pumpkin puree
-
1/2 tsp pumpkin pie spice
-
1/4 cup white chocolate chips
-
1/2 cup candy corn
-
Sprinkles
Instructions
-
Step 1
Prepare a 9×13 inch baking pan by lightly greasing it or lining it with parchment paper, leaving an overhang for easy lifting. -
Step 2
In a large saucepan over low heat, melt the butter completely. Add the mini marshmallows and stir constantly until fully melted and smooth, being careful not to burn them. -
Step 3
Remove the saucepan from the heat. Stir in the pumpkin puree and pumpkin pie spice until thoroughly combined and the mixture is a uniform orange hue. -
Step 4
Add the Rice Krispies cereal to the pumpkin-marshmallow mixture. Gently fold until every piece of cereal is coated. Work quickly while the mixture is warm. -
Step 5
Pour the mixture into the prepared pan. Using a greased or dampened spatula, press the mixture evenly into the pan. If using, sprinkle white chocolate chips, candy corn, and sprinkles over the top while still warm and gently press them in. -
Step 6
Allow the treats to cool and set completely at room temperature for at least 30 minutes to an hour before cutting into desired squares or bars.
Important Information
Nutrition Facts (Per Serving)
It is important to consider this information as approximate and not to use it as definitive health advice.
Allergy Information
Please check ingredients for potential allergens and consult a health professional if in doubt.