Renee Paj Recipe – Easy Delicious Dessert
Renee Paj is more than just a dessert; it’s a whispered promise of comfort, a culinary hug on a chilly evening, and a vibrant burst of sunshine on a lazy afternoon. This delightful treat, often passed down through generations, holds a special place in so many hearts, and for good reason. Its enchanting blend of textures and flavors is simply irresistible. Imagin extracte a creamy, luscious custard base, kissed with delicate hints of vanilla and perhaps a whisper of citrus zest, all nestled beneath a beautifully caramelized, slightly crisp sugar crust. It’s that mesmerizing crackle as your spoon breaks through the surface, followed by the velvety smoothness beneath, that truly captivates. Everyone loves Renee Paj because it’s simultaneously elegant and approachable, sophisticated yet utterly comforting. It’s the kind of dessert that brings smiles to faces and sparks nostalgic memories, making every spoonful an experience to savor. We’re thrilled to share our beloved Renee Paj recipe with you today, so you can bring this magic into your own kitchen.
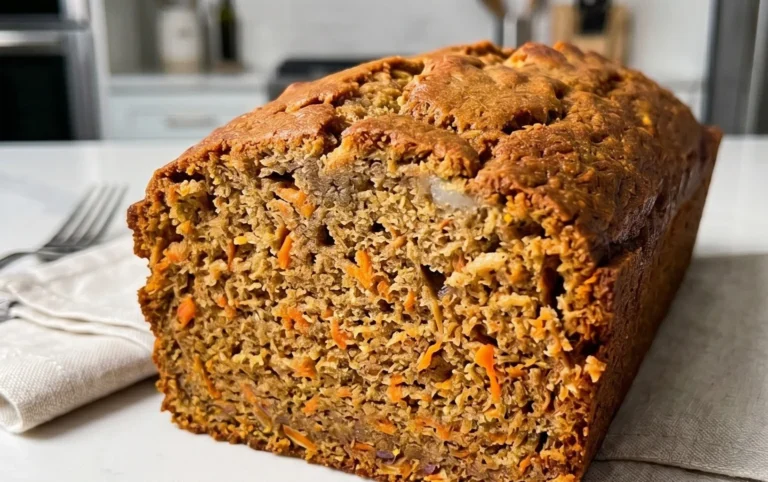
Renee Paj: A Comforting Slice of Banana Oatmeal Bliss
There’s something truly magical about a warm, homemade baked good that feels both comforting and incredibly satisfying. My Renee Paj is exactly that – a delightful fusion of hearty oats, sweet ripe bananas, and a hint of warming cinnamon, all baked into a wonderfully moist and flavorful bar. This recipe is a fantastic way to use up those overripe bananas that are just beggin extractg for a delicious destiny, and it’s so simple to whip up, making it perfect for a weekend treat or even a special breakfast. The texture is divine: a slightly chewy base from the oats, tender pockets of banana, and a hint of crunch if you opt for the walnuts. It’s the kind of treat that fills your kitchen with an irresistible aroma as it bakes, promising pure indulgence.
This Renee Paj recipe is incredibly forgiving, making it a great option for bakers of all levels. The natural sweetness of the bananas means you don’t need a lot of added sugar, and the oats provide a wonderful wholesome base. I’ve found that the riper the bananas, the more intense the banana flavor and the sweeter the final product will be. Don’t shy away from those freckled beauties! They’re the secret ingredient to a truly exceptional batch.
Ingredients:
Cooking Instructions:
Phase 1: Preparing the Dry Ingredients
First things first, let’s get our dry ingredients ready. In a large mixing bowl, combine the old fashioned oats, all purpose flour, and the light brown sugar. You want to make sure that brown sugar is packed firmly into your measuring cup to ensure you get the right amount of sweetness. Next, add the dry leavening agents and spices: the kosher salt, baking soda, baking powder, and the fragrant ground cinnamon. Whisk these ingredients together thoroughly. This step is important for evenly distributing the leavening agents, which will help your Renee Paj rise beautifully, and the salt, which balances the sweetness. Make sure there are no clumps of flour or brown sugar hiding. A good whisking here is the foundation for a perfectly textured Paj.
Phase 2: Mashing the Bananas and Wet Ingredients
Now for the star of the show – the bananas! Take your 3 large, ripe bananas and place them in a separate medium-sized bowl. You can use a fork or a potato masher to mash them until they are mostly smooth, with just a few small chunks remaining for texture. Don’t over-mash them into a complete puree; those little banana bits add delightful pockets of flavor and moisture. To this mashed banana mixture, add the 2 large eggs, the pure vanilla extract, and the 3 tablespoons of cooking oil. I typically use canola oil as it has a neutral flavor, but corn oil or even a light vegetable oil will work just fine. Whisk everything together until it’s well combined and the mixture is a lovely uniform color. The vanilla extract will enhance the natural sweetness of the bananas and add a wonderful aroma.
Phase 3: Combining Wet and Dry
It’s time to bring it all together! Pour the wet banana mixture into the bowl with the dry ingredients. Now, gently fold everything together using a spatula or a wooden spoon. Be careful not to overmix the batter. Overmixing can develop the gluten in the flour too much, resulting in a tougher Paj. We want a tender crum extractb, so mix just until you no longer see any dry streaks of flour. If you’re using them, this is also the time to gently fold in the 1/3 cup of chopped walnuts. They will add a delightful nutty crunch that complements the soft banana and oats wonderfully. Ensure the walnuts are distributed evenly throughout the batter.
Phase 4: Baking the Renee Paj
Preheat your oven to 350 degrees Fahrenheit (175 degrees Celsius). Grease and flour a 9×13 inch baking pan, or line it with parchment paper for easier removal. Pour the batter into the prepared pan and spread it out evenly with your spatula, ensuring the surface is as level as possible. This will help the Paj bake uniformly. Place the pan in the preheated oven and bake for approximately 30-35 minutes. You’ll know your Renee Paj is ready when a toothpick inserted into the center comes out clean, or with just a few moist crum extractbs attached. The top should be golden brown and slightly firm to the touch. Keep an eye on it during the last few minutes of baking, as oven temperatures can vary.
Phase 5: Cooling and Serving
Once baked, remove the pan from the oven and let the Renee Paj cool in the pan on a wire rack for at least 15-20 minutes. This is crucial! Allowing it to cool in the pan helps it set up properly. Once it has cooled sufficiently, you can carefully lift it out of the pan using the parchment paper overhangs or invert it onto the wire rack to cool completely. Once completely cooled, you can cut it into squares or bars. I love to serve my Renee Paj warm, perhaps with a dollop of Greek yogurt or a drizzle of honey, but it’s equally delicious at room temperature. It stores well in an airtight container at room temperature for a few days, or in the refrigerator for up to a week. Enjoy this comforting, homemade treat!
Conclusion:
There you have it – the delightful Renee Paj recipe, a true testament to simple ingredients yielding incredible flavor! This recipe is fantastic because it’s incredibly approachable for home cooks of all skill levels, yet delivers a rich, comforting, and satisfying dish that feels truly special. The beautiful balance of textures and the aromatic spices make it perfect for a weeknight treat or a more impressive gathering. I absolutely encourage you to give this Renee Paj a try; you won’t be disappointed with the delicious results!
Serving this Renee Paj is a joy! It’s wonderful on its own, allowing its natural flavors to shine. However, for a more complete meal, consider pairing it with a simple green salad dressed with a light vinaigrette to cut through the richness. A dollop of sour cream or Greek yogurt also adds a lovely tangy contrast. For a more festive occasion, you could serve it alongside some crusty bread for dipping, or even with a side of roasted root vegetables. Don’t be afraid to experiment with variations too! You could add some finely diced bell peppers or a pinch of smoked paprika for a smoky depth. If you’re feeling adventurous, a sprinkle of toasted nuts on top would add a delightful crunch.
Frequently Asked Questions about Renee Paj:
What if I don’t have all the spices listed for the Renee Paj?
While the specific spice blend is part of what makes this Renee Paj unique, you can adapt! If you’re missing one, try omitting it and focusing on the others. Alternatively, a general “mixed spice” or “pumpkin pie spice” blend can be a good substitute, though the flavor profile will be slightly different. The key is to ensure you have enough aromatic elements to create a warm and inviting dish.
Can I make the Renee Paj ahead of time?
Yes, absolutely! The flavors of the Renee Paj often meld and deepen beautifully when made a day in advance. This makes it a perfect candidate for meal prepping or for entertaining. Simply store it in an airtight container in the refrigerator and gently reheat it on the stovetop or in the oven before serving. You might need to add a splash of liquid if it seems a little thick after chilling.
Renee Paj
A delicious and simple banana oat bread, perfect for breakfast or a snack.
Ingredients
-
1 cup old fashioned oats
-
1 1/4 cups all purpose flour
-
1/2 cup light brown sugar, packed
-
1/2 tsp. kosher salt
-
1/2 tsp. baking soda
-
1/4 tsp. baking powder
-
1/2 tsp. ground cinnamon
-
3 large, ripe bananas, cut into chunks
-
2 large eggs
-
1 tsp. pure vanilla extract
-
3 TBSP cooking oil (corn, canola, etc)
-
1/3 cup chopped walnuts (optional)
Instructions
-
Step 1
Preheat oven to 350°F (175°C). Grease and flour a 9×5 inch loaf pan. -
Step 2
In a large bowl, whisk together the all-purpose flour, light brown sugar, kosher salt, baking soda, baking powder, and ground cinnamon. -
Step 3
In a separate bowl, mash the ripe bananas until smooth. Whisk in the eggs, pure vanilla extract, and cooking oil until well combined. -
Step 4
Pour the wet ingredients into the dry ingredients and mix until just combined. Do not overmix. -
Step 5
Gently fold in the old fashioned oats and chopped walnuts (if using). -
Step 6
Pour the batter into the prepared loaf pan and spread evenly. -
Step 7
Bake for 50-60 minutes, or until a wooden skewer inserted into the center comes out clean. -
Step 8
Let the bread cool in the pan for 10 minutes before transferring it to a wire rack to cool completely.
Important Information
Nutrition Facts (Per Serving)
It is important to consider this information as approximate and not to use it as definitive health advice.
Allergy Information
Please check ingredients for potential allergens and consult a health professional if in doubt.